Assembly Guide for Wood and Metal Frames
Maybe you’re still thinking about ordering a snazzy new unassembled frame, or maybe you have already ordered one and need some help with the setup. Either way, you’ll be pleasantly surprised to see just how easy it is to assemble your new beautiful frame!

Assembly Guide for Wood Shadow Box
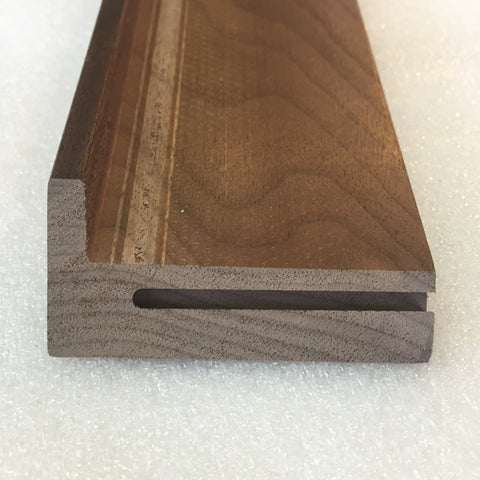
1. Dovetail Keyways (slots) are routed in both mitered ends with our pneumatically operated routing machine.
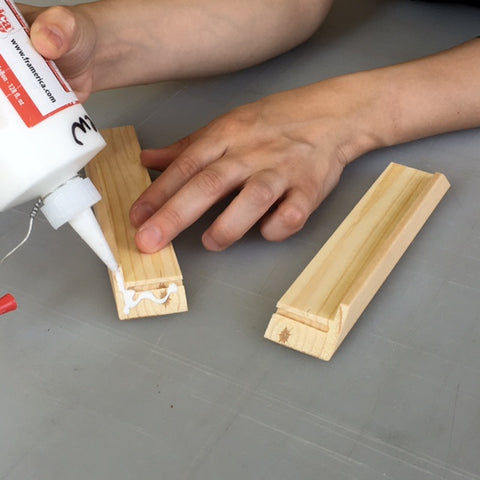
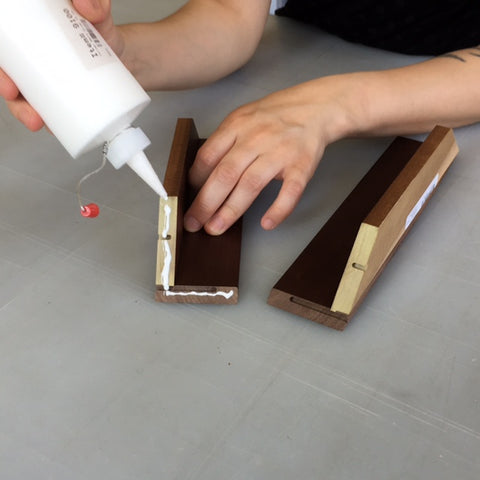
2. Wood glue is applied to the miters and the parts are placed together to form a corner.
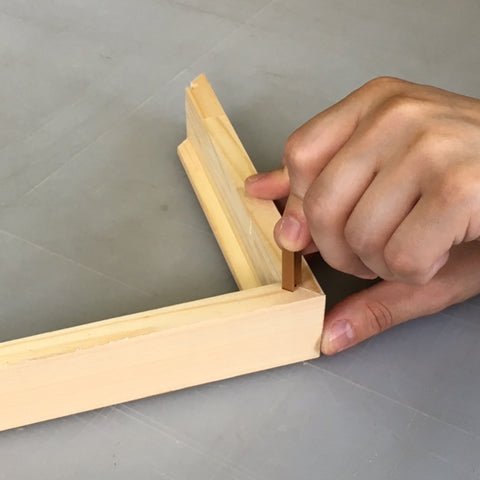
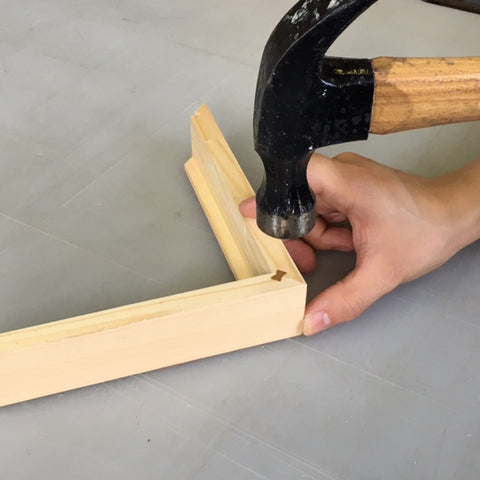
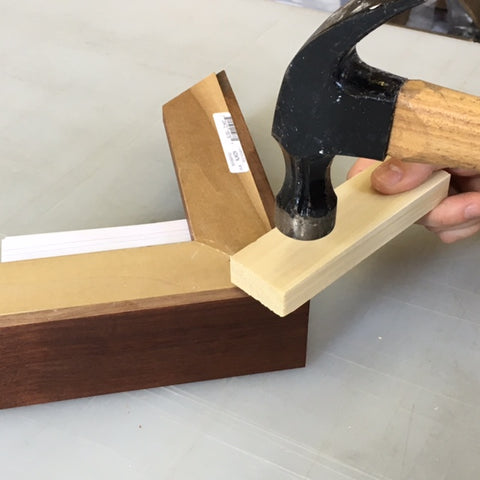
3. Dovetail Keys are started into keyways by hand and then driven home with a hammer (watch video for more tips). If the dovetail slot is very close to the outside edge, we suggest you to use a small piece of wood in between the hammer and the dovetail key to prevent damage to the frame.
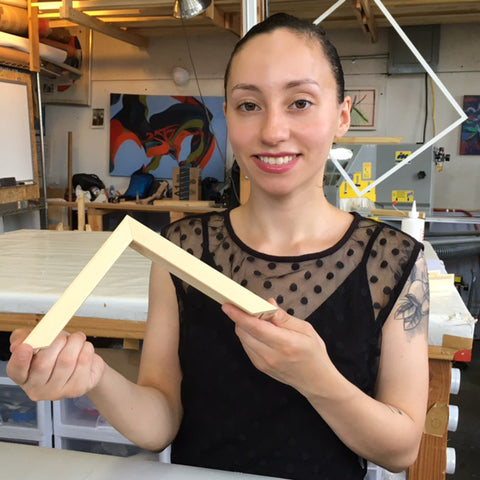
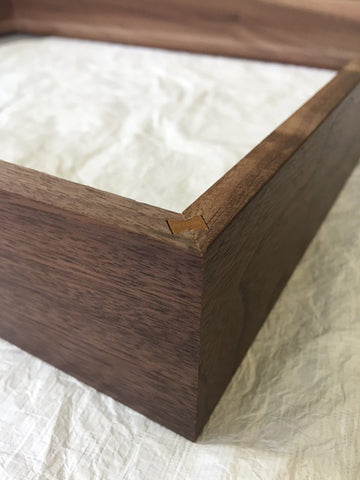
4. A permanent, strong and reliable joint is created.
Assembly Guide for Wood Floater Frames
1. Wood glue is applied to the miters and the parts are placed together to form a corner.
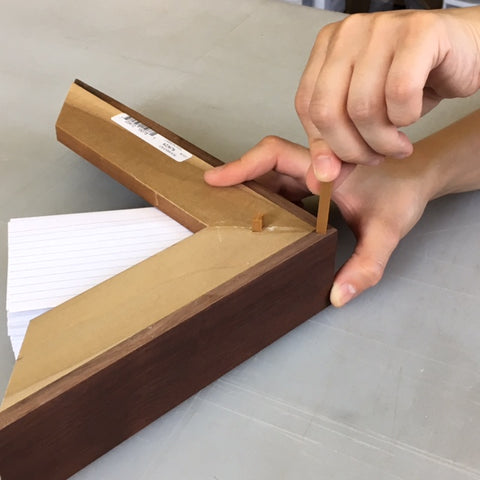

2. Place index cards under the join for support (watch video for more tips). Dovetail Keys are started into keyways by hand and then driven home with a hammer. If the dovetail slot is very close to the outside edge, we suggest you to use a small piece of wood in between the hammer and the dovetail key to prevent damage to the frame.
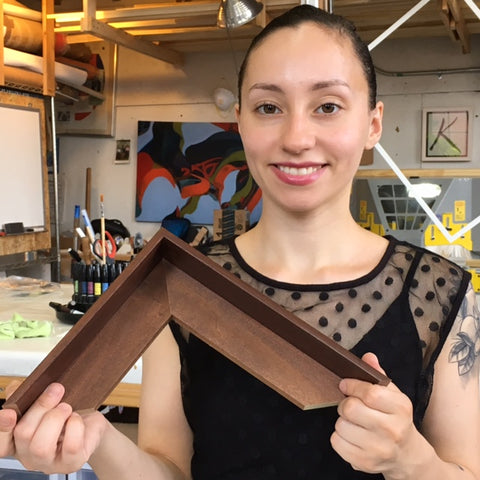
3. A permanent, strong and reliable joint is created.
Need some more visuals? Watch this video to see step-by- step procedures of a variety of dovetailed frames.
Assembly Guide for Nielsen Bainbridge Aluminum Frames

1. Insert a bottom L corner plate (Letter A with no screws) and a top L corner plate (Letter B with screws) into the back channel at the end of one frame side.
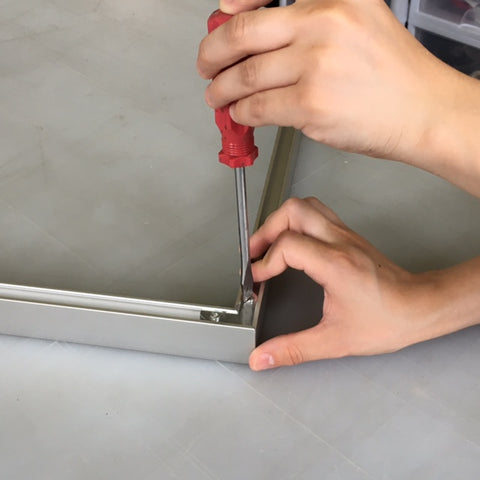
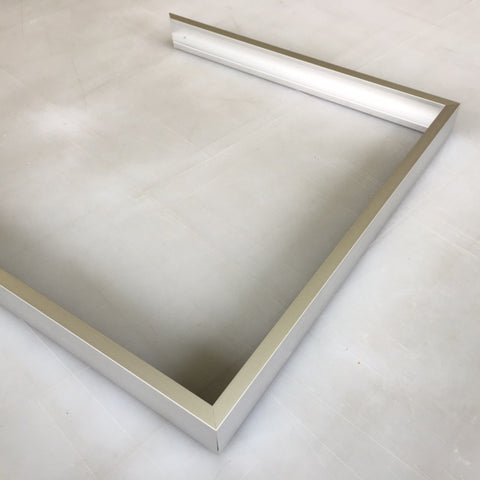
2. Slide an adjacent frame side onto the protruding corner plates and tighten with a screw driver. Repeat to create a U shape with three frame sides. Flip your frame right-side up.
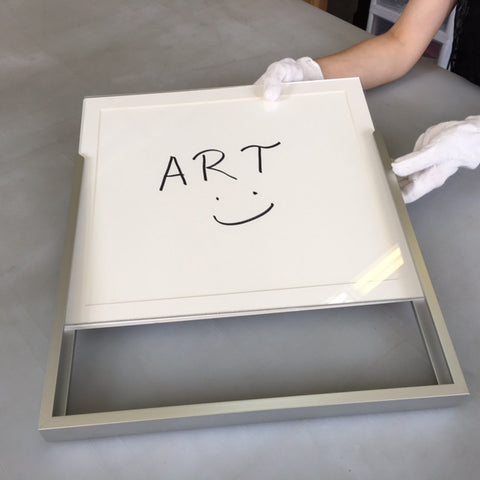
3. All at one time, slide your cleaned frame contents into the exposed channel of the frame. (We recommend to use plexiglass with metal frames. Regular glass might break. Don’t slide the glazing in alone without the artwork, it may scratch!)
4. Insert corner plates at both ends of the last frame side, slide it on and tighten the screws.

5. Flip the frame over and ensure all the corners meet well and are tight. Re-adjust the screws if necessary.

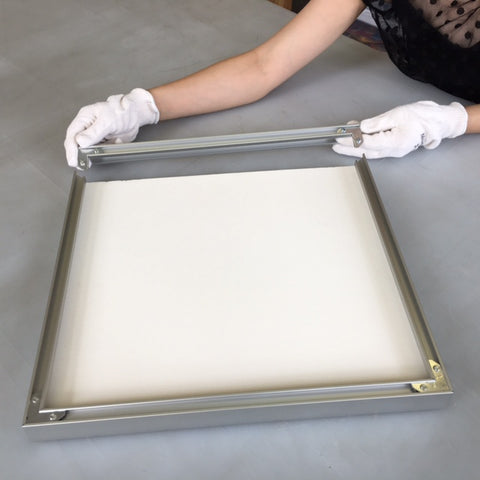
6. Slide your springs, evenly spaced, into the gap along the edges on the back of the frame. These will keep the frame contents toward the front and snug.
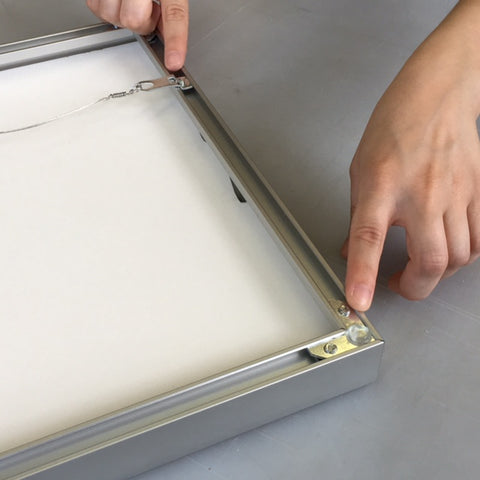
7.Install hangers into the channels of the vertical sides and tight the screws. Hangers should be 1/4 to 1/3 of the way down from the top. Slip the wire (at least 6” wider than the width of the frame) through its holes in the hangers then wrap the wire around itself at least five times. Excess wire can either be wrapped or trimmed off. Then, stick the rubber wall bumper (supplied) onto the plate in each of the bottom two corners. The wall bumpers help keep your picture square on the wall and also help prevent scuffing.
Done! Enjoy your framed artwork.